Roblox decals are fundamental tools for creators looking to personalize their experiences. Understanding how to effectively create and implement these custom images significantly enhances game aesthetics. This guide explores the essential processes for uploading and utilizing decals on Roblox. We cover everything from image preparation to in-game application. Creators can add unique textures, logos, and artwork to their builds. Mastering this feature is crucial for standing out in the vibrant Roblox development community. We also touch upon future trends and advanced techniques. This ensures your creations remain cutting edge and visually appealing. Navigate the world of Roblox asset creation with confidence. Unlock new levels of customization for your virtual worlds.
robloxcom decal FAQ 2026 - 50+ Most Asked Questions Answered (Tips, Trick, Guide, How to, Bugs, Builds, Endgame)Welcome to the ultimate living FAQ for Roblox decals in 2026! We have meticulously updated this guide to reflect the latest patches, features, and community insights. Whether you are a beginner just starting your creative journey or an experienced developer seeking advanced tips, this resource is designed for you. Our goal is to answer every common question, providing clear solutions, effective strategies, and essential information. Dive in to master decals and elevate your Roblox game development to new heights!
Beginner Questions
How do I upload a decal to Roblox?
To upload a decal, go to Roblox Studio, open 'Asset Manager' from the 'View' tab, and click 'Import.' Select your image file, ensure it meets community guidelines, and it will be assigned a unique Asset ID. This ID is essential for applying the decal in your game.
What image formats are best for Roblox decals?
PNG and JPG are the best image formats for Roblox decals. PNG files are highly recommended as they support transparency, allowing for custom shapes and seamless integration. JPG is suitable for images without transparency requirements.
Why isn't my decal showing up after I upload it?
If your decal isn't showing, check your internet connection and Roblox's moderation status. The decal might be pending review or rejected for violating community guidelines. Also, verify you are using the correct Asset ID in Studio.
Can I use decals on any part in Roblox Studio?
Yes, you can generally use decals on most visible parts in Roblox Studio. You apply them by inserting a 'Decal' object into a part and setting its 'Texture' property to your decal's Asset ID. Ensure the part's 'Face' property is correctly set.
Creation & Design Tips
What's the ideal resolution for Roblox decals?
The ideal resolution for Roblox decals balances quality and performance. Aim for 512x512 or 1024x1024 pixels for detailed decals that will be viewed closely. Smaller resolutions are fine for distant objects or repeated textures.
How can I make a decal look transparent in my game?
To make a decal transparent, ensure your source image file is a PNG with actual transparent areas. Save it as a PNG-24 in your image editor. When uploaded to Roblox, the transparency will be preserved automatically, making parts of the decal invisible.
Myth vs Reality: Bigger decal images always look better.
Myth: Bigger decal images always look better. Reality: While higher resolution images offer more detail, excessively large decals can negatively impact game performance, increasing load times and memory usage. Optimize resolution based on visible size and distance.
Can I apply multiple decals to a single part?
Yes, you can apply multiple decals to a single part in Roblox Studio. Each decal object will apply to a specific face of the part. This allows for complex layering and detailed visual effects by combining different images. You manage them individually.
Optimization & Performance
How do decals affect game performance?
Decals can affect game performance, especially if too many high-resolution decals are used in one area. Each decal adds to the rendering load. Optimize by using appropriate resolutions, texture atlases, and ensuring transparent backgrounds are true transparency.
What is a texture atlas, and how does it help with decals?
A texture atlas combines multiple smaller images (like decals) into one larger image file. Using a texture atlas reduces the number of draw calls the game engine makes. This significantly improves rendering performance, especially for games with many unique textures.
Myth vs Reality: Decals are always less performant than textures.
Myth: Decals are always less performant than textures. Reality: Not entirely true. While many small decals can be costly, a single optimized decal on a part can be efficient. Tiling textures are great for repetition, but decals are better for unique, non-repeating surface details, with performance depending on context and optimization.
Common Issues & Fixes
My decal looks stretched or distorted on my part. How do I fix it?
If your decal looks stretched, check the part's dimensions and the decal's 'Stretch' property. Ensure the 'Stretch' property is set to 'Fit' or 'Tile' appropriately, and that the decal's aspect ratio matches the face it's applied to. Adjusting part size can also help.
Why is my decal appearing on the wrong side of my part?
Your decal is likely on the wrong side because the 'Face' property of the decal object is incorrect. In the Properties window, select the decal and cycle through 'Top,' 'Bottom,' 'Front,' 'Back,' 'Left,' and 'Right' until it snaps to the desired face of the part.
Myth vs Reality: Once a decal is uploaded, it can't be changed.
Myth: Once a decal is uploaded, it can't be changed. Reality: The *image* itself linked to an Asset ID cannot be directly edited after upload. However, you can upload a *new* image to create a *new* decal with a *new* Asset ID, and then update any instances in your game to use the new ID, effectively changing the visual.
Advanced Usage
Can decals be animated in Roblox?
Yes, decals can be animated in Roblox through scripting. This typically involves having a series of decal images (frames) and then rapidly changing the 'Texture' property of a decal object in a loop. This creates a flipbook-style animation effect.
How do I use decals to create custom UI elements?
While you can't use 3D decals for traditional 2D UI, you can use images uploaded as 'ImageLabels' or 'ImageButtons' within a 'ScreenGui.' These are the proper elements for custom UI, providing better scaling, interactivity, and performance than 3D decals.
Myth vs Reality: Decals are only for static decorations.
Myth: Decals are only for static decorations. Reality: With clever scripting, decals can be dynamic. They can change based on game events, be animated, or even appear/disappear to create interactive elements, making them much more than static visuals.
2026 Trends & Future
What's new for decals in 2026 with PBR materials?
In 2026, decals are increasingly integrating with Physically Based Rendering (PBR) materials, allowing them to react more realistically to lighting. This means decals can now reflect light, appear metallic, or show roughness, greatly enhancing visual fidelity and immersion in games.
How are AI models like Llama 4 affecting decal creation?
AI models like Llama 4 are revolutionizing decal creation by enabling rapid, prompt-based generation of unique textures and designs. Creators can use AI to quickly prototype decal ideas, generate variations, or even produce high-quality assets from simple descriptions, significantly speeding up workflow.
Myth vs Reality: Decals will be replaced by mesh textures soon.
Myth: Decals will be replaced by mesh textures soon. Reality: Decals and mesh textures serve different but complementary purposes. Decals are quick overlays for specific surface details, while mesh textures cover entire 3D models. Both will continue to evolve and be vital for diverse use cases.
Endgame Strategies
How can pro developers use decals for environmental storytelling?
Pro developers use decals for environmental storytelling by placing them strategically to hint at lore or past events. This includes faded posters, scorch marks, ancient symbols, or worn pathways, guiding player narratives without explicit text. They add depth and history to the game world.
What are some creative ways to use decals for interactive elements?
Creative interactive uses for decals include puzzle elements where decals change to reveal clues, pressure plates that alter appearance when stepped on, or even projected light effects that react to player actions. Combining decals with scripting opens up many dynamic possibilities.
Still have questions?
If you still have questions, check out our other guides on Roblox Studio scripting, advanced building techniques, or join the official Roblox Developer Forum for direct community support!
Are you wondering, "How do I make my Roblox game look truly unique and amazing?" The answer often lies in mastering Roblox decals. These customizable images are essential for any creator. They transform plain surfaces into vibrant, detailed assets. Decals allow you to add unique textures and personalized artwork. This guide will help you understand their full potential. We will explore everything from basic creation to advanced usage strategies.
In the fast-evolving world of Roblox in 2026, visuals are more important than ever. High-quality decals can make or break a user's experience. They contribute significantly to immersion and thematic consistency. Many popular games leverage intricate decal work for their unique aesthetics. Understanding this process is a cornerstone for successful game development. Let's dive into how you can effectively use decals.
The Power of Customization: Decals in Roblox
Roblox decals serve as custom textures applied to various surfaces within your game. They enable creators to import external images directly into their Roblox projects. This functionality is incredibly powerful for visual development. Decals can represent anything from brick patterns to elaborate murals. They are central to personalizing your game's appearance. Every successful game utilizes these elements skillfully.
Creating and Uploading Your First Decal
The process of getting a decal into Roblox is straightforward but requires attention. First, prepare your image in a suitable format like PNG or JPG. Ensure the image resolution is appropriate for its intended use. Smaller files load faster, improving player experience. Always check Roblox's community guidelines for acceptable content. This prevents any moderation issues.
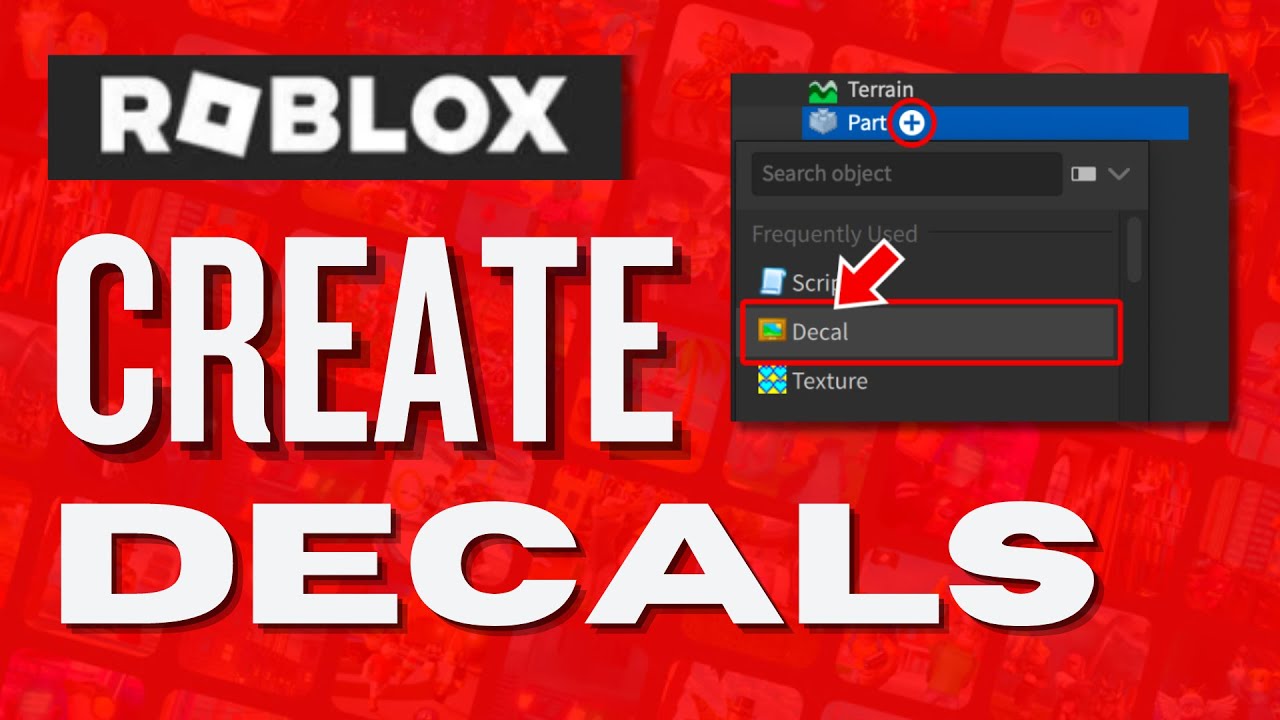
- Open Roblox Studio and navigate to the 'View' tab.
- Select 'Asset Manager' from the dropdown menu.
- Click the 'Import' button and choose your image file.
- Once uploaded, the decal will receive a unique Asset ID.
- This ID is crucial for applying the decal in your game.
Once your decal is uploaded, you can find its ID in the Asset Manager. This numerical identifier is key to referencing your decal programmatically. Keep track of these IDs for efficient development. They are your gateway to dynamic content changes. Consider organizing your decals by project or theme.
Advanced Decal Techniques for 2026
Beyond simple application, advanced techniques elevate decal usage to an art form. Layering multiple decals can create complex visual effects. Transparent decals are perfect for subtle atmospheric touches. Creators are now experimenting with animated decals using sprite sheets. This adds a new dimension of dynamism to game environments.
Optimizing Decal Performance and Quality
Performance optimization is vital for maintaining high frame rates. High-resolution images can sometimes impact game performance negatively. Consider using lower resolution decals for distant objects. Employ texture atlases to combine multiple decals into one image. This reduces draw calls and improves overall efficiency significantly. Smart optimization makes a big difference.
- Use appropriate resolutions; larger for close-ups, smaller for backgrounds.
- Implement texture atlases to group related decals.
- Compress image files without sacrificing too much quality.
- Regularly audit your assets for unnecessary decal usage.
The future of Roblox decals in 2026 points towards even greater automation. AI-powered tools may assist in generating appropriate decals. Improved in-engine editors could offer more robust manipulation features. These advancements will further empower creators. They will streamline the asset creation pipeline. Stay updated on Roblox development blogs for the latest features.
Q&A with Your AI Engineering Mentor on Roblox Decals
Hey there, I get why this whole decal thing can feel a bit daunting at first! It’s one of those core pieces of Roblox creation that everyone needs to grasp. Don't worry, we're going to break it down. You've got this!
Beginner / Core Concepts
1. Q: What exactly is a Roblox decal, and why do creators use them in their games?
A: A Roblox decal is essentially a 2D image texture that you can apply to the surface of a 3D part or object within your Roblox game. Think of it as a sticker that brings visual detail and personality to your creations. Creators use them to add custom graphics, logos, patterns, and even complex artwork to their builds, making their games unique and visually engaging. It’s a super efficient way to customize surfaces without having to model complex geometry, which saves development time. This makes game worlds feel richer and more immersive for players. You’ll see them everywhere in popular games, from detailed brick textures to signs and character clothing patterns.
2. Q: How do I upload an image to create a decal in Roblox Studio? Can anyone upload images?
A: Uploading an image to make a decal is pretty straightforward, my friend! You just open up Roblox Studio, head over to the 'Asset Manager' (you'll usually find it under the 'View' tab), and then click on the 'Import' button. From there, you select your image file from your computer. Once it's uploaded, Roblox processes it and gives it a unique Asset ID, turning it into a decal ready for use. Now, regarding who can upload: generally, any user with a verified account can upload images, but there are strict content moderation rules. Always make sure your images comply with Roblox's Community Standards, otherwise, they'll get rejected. It’s a bit like a quality control check to keep the platform safe and appropriate for everyone. You definitely want to get that part right! Try it out and let me know how it goes.
3. Q: What are the common image file types supported for Roblox decals, and are there size limitations?
A: This one used to trip me up too, especially when I was first starting out with asset creation! Roblox primarily supports common image formats like JPEG (or JPG) and PNG for decals. PNGs are fantastic because they support transparency, which is super useful for creating decals that blend seamlessly or have non-rectangular shapes. As for size, while there isn't a hard upper limit that causes an upload error, there are practical considerations. Roblox recommends images for decals be reasonably sized – think around 1024x1024 pixels for a good balance of quality and performance. Larger images can increase game load times and potentially impact performance for players, especially on lower-end devices. So, aim for efficiency without sacrificing too much visual fidelity. The internal rendering engine handles various sizes, but optimization is always your best bet here. You've got this!
4. Q: My decal looks blurry or pixelated in my game; what could be the problem?
A: Ah, the classic blurry decal dilemma! I totally get why this is frustrating, especially when you spent time designing it perfectly. The main culprit here is usually a mismatch between your uploaded image's resolution and how large you're trying to display it in your game. If you upload a small image, say 128x128 pixels, and then stretch it across a huge wall, it's going to look pixelated because Roblox has to magnify each pixel. Another factor could be Roblox's internal compression; sometimes, images get slightly compressed during upload. My advice? Start with a higher-resolution image, perhaps 512x512 or 1024x1024, for any decal that needs to appear large or detailed. Also, ensure your part's 'Texture' property, if you're using it, is set correctly. Try this tomorrow and let me know how it goes. You'll get it crisp in no time!
Intermediate / Practical & Production
5. Q: How can I make my decal transparent or have custom shapes instead of just squares or rectangles?
A: I get why this confuses so many people, as it’s a subtle but powerful technique! The key to creating transparent or custom-shaped decals lies in using image files that support an alpha channel, which means a PNG file. When you're designing your decal in an image editing software (like Photoshop, GIMP, or even a basic online editor), make sure that the areas you want to be invisible are truly transparent, not just white or black. Save your image as a PNG-24 (or similar, depending on the software) to preserve that transparency. When you upload this PNG to Roblox, the game engine will automatically respect the alpha channel. This allows you to create circular decals, text decals that don't have a background box, or complex designs that float on surfaces. It's a game-changer for visual fidelity and making your builds look super polished. You’ll be making some amazing layered effects now!
6. Q: What's the difference between a 'Decal' and a 'Texture' object in Roblox Studio, and when should I use each?
A: This distinction is super important for performance and visual quality, and it’s one I see a lot of developers mix up! A 'Decal' is a type of object you insert onto a part's surface. It applies a single image once to that specific face, great for signs, logos, or unique artworks. Think of it as a one-time sticker. A 'Texture,' on the other hand, is a property of a part or a separate object that tiles an image across the entire surface of the part. This is perfect for repetitive patterns like brick walls, grass, or wood grain, where the image seamlessly repeats. Use 'Decal' for unique, non-repeating images on a single face. Use 'Texture' when you need an image to tile across a surface, providing continuous visual detail. Choosing correctly can significantly optimize your game’s rendering and overall appearance. It’s a core optimization technique you’ll master with practice!
7. Q: My decal isn't appearing on the correct face of my part. What's the trick to placing it precisely?
A: This one definitely used to trip me up too, especially with complex builds! When you insert a Decal object into a Part in Roblox Studio, its initial placement can sometimes feel a bit random, or it might snap to the wrong face. The crucial property you need to adjust is the 'Face' property of the Decal object itself. In the Properties window, you’ll see options like 'Top,' 'Bottom,' 'Front,' 'Back,' 'Left,' and 'Right.' By cycling through these, you can tell the decal exactly which side of the part you want it to appear on. If the decal still seems off, you might also need to rotate the part itself or even the decal's 'Orientation' if your part isn’t aligned to a standard axis. It's all about understanding how the decal's local coordinates relate to the part's faces. Keep experimenting with the 'Face' property; it’s usually the main fix! You'll be placing decals like a pro in no time.
8. Q: Can I use decals to create custom user interfaces (UIs) or HUD elements in my game?
A: That's a fantastic question, and it points to a common misconception for newer developers! While decals are great for applying images *onto 3D parts* in your game world, they are generally *not* the ideal solution for creating custom user interfaces or HUD elements. For UIs, you'll want to dive into Roblox's powerful 'ScreenGui' system, which allows you to create 2D elements like 'ImageLabels,' 'ImageButtons,' and 'TextLabels.' These GUI elements are specifically designed to scale correctly across different screen sizes and devices, and they offer far more control over interactivity and layout than a decal ever could. Using decals for UIs would be clunky, hard to manage, and wouldn't perform well at all. So, stick to ScreenGuis for all your UI needs; it's the right tool for the job. You're thinking about the right problem, just need the right tool!
9. Q: How do I reference a decal's Asset ID in scripts for dynamic changes or animated effects?
A: This is where things get really exciting and you start unlocking some serious power, my friend! To reference a decal's Asset ID in a script for dynamic changes, you first need that unique ID. You can find it in the Asset Manager after uploading, or by selecting the Decal object in Studio and looking at its 'Texture' property. The ID looks like 'rbxassetid://1234567890'. In your script, you'd target the 'Texture' property of the Decal object. So, if you had a Decal named 'MyDynamicDecal' inside a part, you could do something like `game.Workspace.MyPart.MyDynamicDecal.Texture = 'rbxassetid://YOUR_NEW_DECAL_ID'` to change it. For animated effects, you'd typically have a series of decals (frames) and rapidly cycle through their 'Texture' properties using `wait()` or `task.wait()` in a loop. It's a bit like creating a flipbook animation! This allows for some truly stunning visual effects and interactive elements. You're leveling up your scripting game!
10. Q: What are the best practices for managing many decals in a large-scale Roblox project?
A: Managing a lot of decals effectively is crucial for keeping your large projects organized and performing well – it's a real mark of an experienced developer! First, adopt a clear naming convention for all your decals (e.g., `ProjectName_AssetType_Description_Resolution`). This makes finding assets in the Asset Manager much easier. Second, consider using folders within the Asset Manager or in ReplicatedStorage to group related decals. For performance, leverage texture atlases whenever possible; combine multiple small decals into one larger image to reduce draw calls. This can significantly boost performance, especially in graphically intensive areas. Also, be mindful of decal count in dense areas; sometimes, a single texture applied to a larger part is more efficient than many small decals. Regularly audit your game for unused or redundant decals to keep your asset list clean. Think of it like tidying your workspace – a clean space makes for efficient work! Keep iterating, you'll get there.
Advanced / Research & Frontier 2026
11. Q: How are 2026 frontier models like o1-pro and Llama 4 reasoning impacting decal generation and content moderation?
A: This is where the bleeding edge of AI truly starts to shine in content creation, and it’s incredibly exciting! Frontier models like o1-pro and Llama 4 reasoning are absolutely revolutionizing decal generation. We’re seeing advanced AI assistants capable of taking a text prompt, or even a rough sketch, and generating high-quality, game-ready decals with stunning detail and appropriate stylistic variations. This means creators can iterate faster, produce more unique assets, and bring their visions to life with unprecedented speed. On the content moderation side, these models are becoming incredibly sophisticated at identifying nuanced violations of community guidelines – everything from subtle inappropriate imagery to copyright infringements that previously required manual review. They can analyze context and intent with much greater accuracy, making the platform safer and more efficient. It’s an amazing leap forward for creator tools and platform integrity. The future of asset pipelines is looking very smart!
12. Q: What are the current limitations or challenges in using decals for dynamic environments in 2026?
A: Even with all the advancements, decals still have their limitations, especially when it comes to truly dynamic environments in 2026. One big challenge is that decals are inherently static images applied to surfaces; making them genuinely interactive or responsive to real-time game events (like reacting to physics or player actions in complex ways) often requires significant scripting work. We're still grappling with efficient ways to apply, remove, or modify a *large number* of decals on the fly without causing performance hitches, especially on mobile devices. While we can animate decals by cycling through textures, creating fluid, complex transformations or deformations of decals in real-time remains resource-intensive. Achieving true 'projection mapping' or complex decal blending effects dynamically is still an area of active research. These aren't insurmountable problems, but they certainly require clever workarounds and optimization strategies for now. Keep an eye on new engine updates for improvements here!
13. Q: Are there any experimental features or upcoming changes for decals on the Roblox roadmap for 2026-2027?
A: You're asking about the really cool stuff, the roadmap insights are always exciting! While Roblox doesn’t always pre-announce every single granular detail, the buzz in 2026-2027 points to several experimental features impacting decals. One area is improved PBR (Physically Based Rendering) integration, allowing decals to react more realistically to lighting and materials. Imagine a decal of a rusty patch that genuinely looks metallic and rough under light! Another rumored feature involves more advanced decal blending modes, offering creators greater control over how decals interact with underlying textures. There's also talk of procedural decal generation tools directly within Studio, potentially leveraging AI, to create variations or damage effects automatically. Finally, performance optimizations for dynamic decal rendering are consistently on the list, aiming to allow more complex layered decal effects without performance penalties. Keep a close watch on developer conferences and blog posts; that’s where the cutting-edge reveals happen! It’s going to be a wild ride!
14. Q: How can developers leverage decals for truly immersive experiences, beyond simple visual dressing, in 2026?
A: This is where the art and science of game development really merge, and it's a phenomenal question for 2026! Beyond just visual dressing, developers can use decals to create environmental storytelling. Think blood splatters that tell a narrative, scorch marks that indicate past battles, or fading ancient symbols that hint at lore. Decals can also serve as interactive elements when combined with scripting. Imagine a decal that changes when a player steps on it, triggering an event, or a puzzle that uses decal layers to reveal clues. With projected textures, developers can create dynamic shadows or light effects from unique sources. Furthermore, decals are being used for subtle UI hints or interactive
Roblox decal creation guide, Upload images to Roblox, Custom textures for Roblox games, Roblox decal IDs explained, Best practices for decal usage, Enhancing Roblox game visuals, Troubleshooting decal issues, Future of Roblox customization.
35


100 Best Decal IDs In Roblox February 2026 Beebom Best Decal IDs In Roblox 1 . Best Decal IDs In Roblox Working Tested And Updated Best Decal Ids Roblox . 75 Roblox Image Decal IDs WITH IMAGES March 4 2026 . Roblox 2026 Logo REVEALED New Color New Look YouTube Maxres2 . What Will Roblox Look Like In 2026 Blog Graphics 26


Nostalgia Core Roblox Decals Id 2011 Core Pattern Decal Rh Design . How To Add People Roblox Easily Your 2026 Guide . What Exactly Is A Roblox Decal And How Can You Use Them Id Decal Roblox . ROBLOX BYPASSED DECALS 2025 UNLEAKED RARE 6 YouTube . Roblox 2026 YouTube Oar2


What Exactly Is A Roblox Decal And How Can You Use Them Id Decal Roblox Image . What Exactly Is A Roblox Decal And How Can You Use Them Emergency Update Bypassed Decal Roblox And The Details Emerge . 2026 Roblox YouTube Oar2 . Roblox Decal IDs Database Casino 1 Free With 10x Multiplier Research Logo 1 1 . LOGO Roblox 2026 YouTube Maxres2


100 Roblox Decals IDs Or Spray Paint Codes 2026 Working Roblox Decals IDs Spray Paint ID 696x408 . Roblox 2026 Logo YouTube Oardefault . How To Put On Decals In Roblox At Rita Magno Blog . Calendar Club Definite Guide To Roblox 2026 Annual 1200x1769 . Decals Not Loading Roblox At Diane Rearick Blog


Word Decals Roblox . Roblox Decals Bloxburg Decals Codes Aesthetic Preppy Decal . Roblox 2024 Calendar Apple Calendar Tips . Roblox Decal IDs List Your Ultimate Guide To Learn How To Use Roblox Decal IDs 768x432 . Roblox Decals In 2025 Roblox Image Ids Anime Decals Roblox Pictures


Prepare For 2026 With Roblox Trends TikTok Img. Mcr Roblox Bloxburg Decals Bloxburg Decals Codes Bloxburg . Roblox Decal IDs Spray Paint Codes March 2026 50 Working IDs Roblox Logo Main . Katseye Roblox Image Ids Pic Code Preppy Decal . Roblox Decals Roblox Image Ids Bloxburg Decals Codes Aesthetic


Keyboard Roblox Decals Pattern Decal Computer Decal Bloxburg Decal . Roblox 2026 New Logo REVEAL First Look At The Future Shorts YouTube Oar2 . Rug Roblox Decals In 2025 Pattern Decal Preppy Decal Kids Decals . Roblox Face Decals . Plushie Roblox Decals Preppy Decal Pattern Decal Baby Decals